How to Grow Yellow Squash This Summer at home
In this summer, perhaps you’re planning for some flavorful and bright-yellow squash; and to do so, you must know how to grow yellow squash. This amazing fruits grow quickly and you need to check your garden daily. They need full and bright sun; water them regularly to thrive and they’ll ripen within 50-70 days from the plantation.

Planting Yellow Squash
To enjoy some fresh and delicious yellow squash, you need to plant them only if you’re a gardener and love to grow of your own. Now, we’re going to reveal some steps to plant yellow squash for gradual development of your garden and ultimate success.

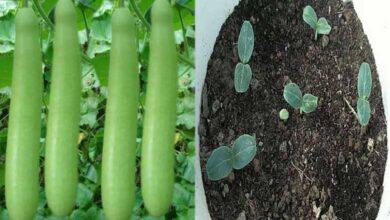
Purchasing Yellow Squash Seeds
For being a common garden vegetable, one can easily find the seeds of yellow squash in any of the store that sells garden supplies. No need to buy a lot of seed packets as one plant is enough to meet demand of a small family all the summer round. Producing for a business purpose is, of course, an exception.
There are two varieties to come in; vining and bush. The first one spreads out over the garden bed. The following variety will require for a lees space and now its your choice to select any of them according to your demand.
There is a second choice for you if you don’t like to start form the seeds. Keep looking while the weather is warmer and the nursery has yellow squash seeds. Perhaps they’ll sell the tender plants soon after the germination and sprouting. Easily you can buy some of them and start form the plants.

Selecting A Perfect Location
Like most other vegetables, yellow squash also needs a full and bright sunny location. Also you should consider the drainage facility of your planting site. Because the squash plants tend to rot and start dying during waterlogging.
- Plant in rows or on hills; consider three to five seeds for per hills.
- Ensure enough space for the plants if you are planning for a vining varieties. With less space, this variety won’t be profitable and sometimes, is totally out of use; means, no fruiting may happen.
- Of course a good planting site has good drainage system. It not only helps to water the plants during the dog days but also extract the extra water from the plant’s rooting system during water logging.
- Ensure a good fertilizer for your soil. Consider some compost or contact a soil test if you have grown vegetables on that site just before.
Mixing A Layer Of Compost; Till The Soil
To ensure the growth of squash plants healthily and strongly, there is hardly any option except to till the soil and to mix some compost. Break up the soil maintaining a depth of 12 inch or 30 cm using a tiller or garden rake. The roots will be helped to take up by the loosen soil. Apply four inches of compost over the ground level and mix with the tilled soil
Sowing The Seeds After Last Frost
Ensure a depth of 1 inch; spacing out them 12 inches apart. sow the seeds. Ensure a lot of space between the seeds as the squash needs a lot of room to actual development.
But, some of the gardeners don’t like to start from the seeds and for them; starting from the seedling is best. In that cause, plant them about 18 inches apart and ensure plenty of room for them for further development.
Wait till the last risk of last frost has passed. If your seeds or plants face with frosting problem, they may result in trouble germination or development.
Caring For Yellow Squash
Ensuring Moisture For Squash Bed
You must ensure one inch of water per month for squash plant. Water the plants thoroughly every morning. Wit the roots for a minute to ensure a good soaking.
- During the rainy days or the mornings when the soil gets moistened automatically, stop watering them regularly. This is essential to prevent water logging.
- Watering at the later part of the days or at night may result in poor outcome or sometimes, damage for the actual development of your plants since the water doesn’t have the chance to evaporate in the sun. again mold growth may be resulted from the water left on the plant.
Thin Your Seedlings According To Necessary
You may ensure thin sprouting of your seeds and the seedlings must be at least 18 inches apart from each other. During the later growing seasons, the plants will be larger and wider; it’s better spreading them as they’ll need vaster space.
- For a hill plantation, thin until it reaches two or three strong plants per hills.
Mulching The Seedlings At First Appearing Leaves
Besides helpings to retain moisture, it ensures safety from the weeds around the plants. Apply any of the organic mulch centering the base of the plants. Apply a hoe for breaking up newly sprouted weeds.
Pinching Off The Growing Tips
Don’t be excited when your plants are growing smoothly and never forget to observe them minutely. When the plants are start vining and the vines are five feet long, don’t allow them anymore. Pinch off the vine to encourage the plants producing squash instead a longer vine. To do so, select the section just out from the last pair of leaves and smoothly pinch off.
Preventing Harmful Pests
Some of the common pests can wreak havoc on the plants. Never let the crisis be out of control. Destroy them soon after they appear by dropping into a pile of soapy water. Among the common, cucumber beetles and squash vine borers are best known.
- Cucumber beetles are the pests having 1 inch of length while squash vine borers are of 1-2 inches. The firsts have black heads along with yellow wings; sometimes, the wings are green. The followings are gray insects.

Harvesting Yellow Squash And Storing Them
When the fruits are 6-8 inches long, start harvesting. If you allow the squashes for a long, they may grow longer but for the best flavor, its the best time to harvest. Cut the fruits off from the stem using a paring knife. Allow a small part of stem intact to save the vine from being hurt during harvesting time.
Checking your plants every day for mature squash is a must. When your plants become active and mature enough to produce fruits, you may be in need to harvest some fruits every day. Don’t let the fruit intact with the vine so that the plants may ensure energy for the newly growing fruits.
Usages Of And Storing The Yellow Squash
It’s really hard to believe that such a delicious vegetable cannot be stored for a long. It’s wise to use them from the beginning of harvesting. Use them for lasagna or soup, or for any item according to your choice. To store them, place them in a plastic bag that is open. Of course you need to store them in a refrigerator even for a week.
“how to grow yellow squash, how to plant yellow squash, how to grow hydroponic coriander, how to grow yellow squash, how does yellow squash grow, yellow squash how to grow, fastest growing vegetable giving quick harvest, how to grow yellow squash, grow yellow squash, yellow squash plant, summer squash plant, yellow zucchini plant, growing yellow squash in containers, yellow zucchini seeds, best vegetables and herbs to grow from kitchen scraps, how to grow yellow squash, yellow squash seedlings, small vegetable garden, small veg garden, how to grow yellow squash.”